In this post we will setup and use Visual Studio Code as Java IDE.
I’m a JetBrains user for long years, I love their products. I use IntelliJ as my default IDE for long time. I also love Visual Studio Code, I use it as my default text editor and my first-go editor for small scripts in NodeJS, Python etc…
As you may know (or may not), Visual Studio Code is very flexible, it has tons of extensions that can be installed. You can install Python extensions to make it work perfectly with your Python files or projects, you can install Angular or React extensions and it will become a great IDE for your front-end projects. And, you can install Java-related extensions and you will get a great free Java IDE (sorry Eclipse).
What we will cover here, in this tutorial:
- Downloading JDK
- Configuring JAVA_HOME in MAC and Linux
- Configuring JAVA_HOME in Windows
- Installing VS Code
- Installing Java extensions
- Configuring JAVA_HOME in VS Code (if you don’t want to define it in your system-wide)
- Working with Java in VS Code
- Working with Tests in VS Code
- Creating new Spring Boot Applications using VS Code
- Recommended VS Code extensions
stop talking, show me how
Before download and install Visual Studio Code, let’s prepare our computer with all the necessary tools which are, Java JDK. VSCode support specific Java JDKs, so before starting, make sure you have one of the following Java JDKs installed:
After installing your preferred JDK, you need to make sure it is probably configured, you need to have
Defining JAVA_HOME ON MAC and LINUX
In Mac and Linux, just hit the Terminal and check if the following command return the JDK home location:
echo $JAVA_HOMEIf it is configured probably, then you should see something as below:

If running the command above did not return any result, then you need to configure it manually by running the following command:
export JAVA_HOME=[INSTALLED_JAVA_LOCATION]Where the INSTALLED_JAVA_LOCATION is the path where you installed your Java JDK. You can configure JAVA_HOME to automatically be configured by adding the line above to your .bash_profile file:
nano ~/.bash_profileAnd paste the export command at the end of the file, and now, each time you restart your computer, the JAVA_HOME will be configured automatically.
DEFINING JAVA_HOME on Windows
In Windows, to define environment variable, you need to go to the Window.
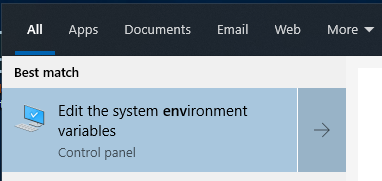
Hit the Windows Home and start typing in the search box the work environment. In the results, press the Edit the system environment variables:
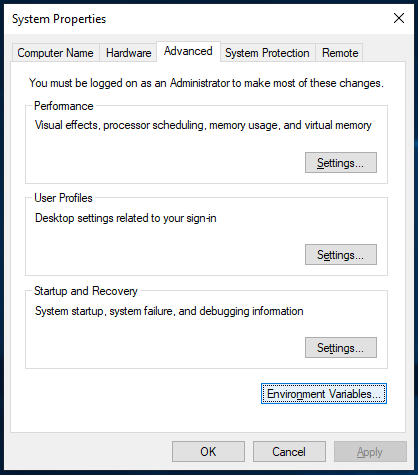
Then, in the System Properties window, press the Environment Variables button:
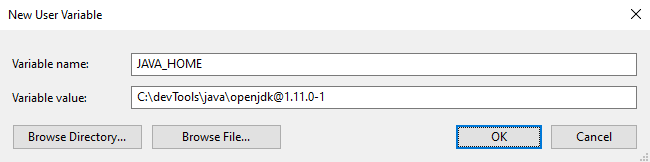
In the new window that will open, under the User Variables section, click the New button and there, in the Variable name enter JAVA_HOME and as the Variable value, enter the location where you installed the JDK:
Now, if you go to the Command Line, and type the following command, you should get your JAVA_HOME location:
echo %JAVA_HOME%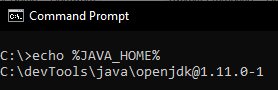
Download and Install VSCode
Downloading and installing Visual Studio Code is straightforward, just got the https://code.visualstudio.com site and download the latest version for your OS.
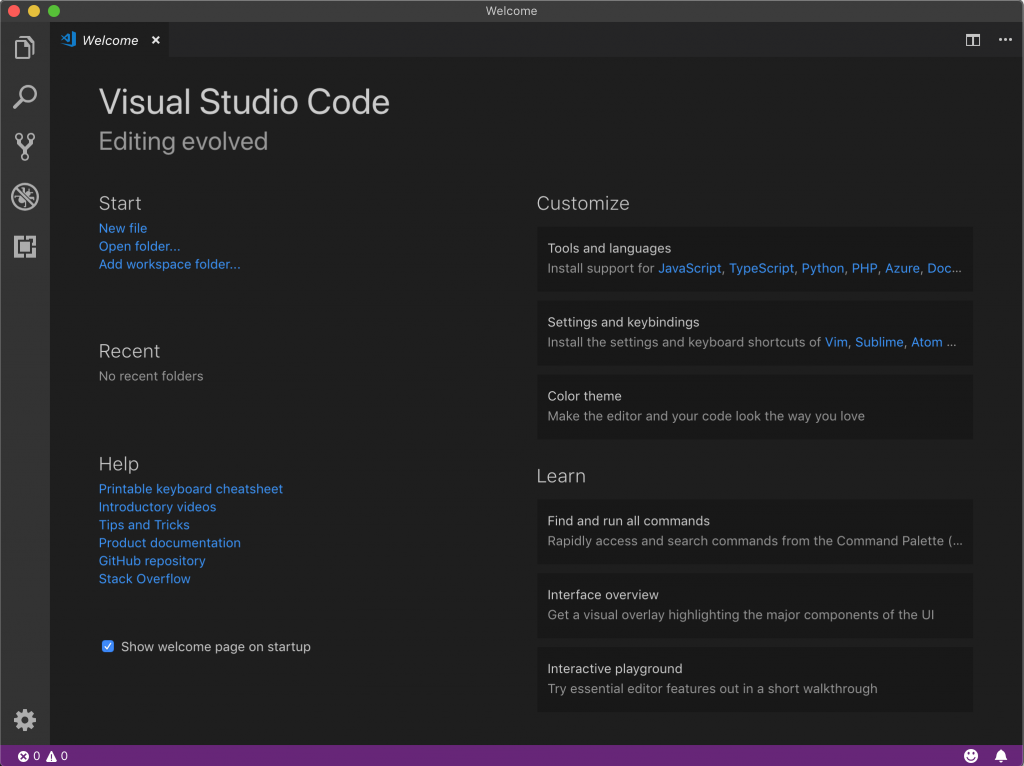
After downloading it, click the setup file and follow the steps in your OS. Then run VSCode:
In this tutorial I’m not going to learn you how to use VS Code, if you want to learn more about VSCode, go to the following resources to learn how to take the most of it:
One thing that you should know is the combination of ⇧⌘P (or, Ctrl+Shift+P in Windows).
⇧⌘P / Ctrl+Shift+P
This key combination will open the Command Palette which there you can run all of the commands you want, from adding multi-cursors to creating new Spring Boot applications (after installing the relevant extensions).
The Command Palette has many usages, once you opened it, and there is the “>” symbol at the beginning of the textbox there, then you can run commands, if you delete the textbox, then you can open a file by its name (equivalent to pressing ⌘P o CTRL+P). If you type question mark there, then you can see all the supported actions as:
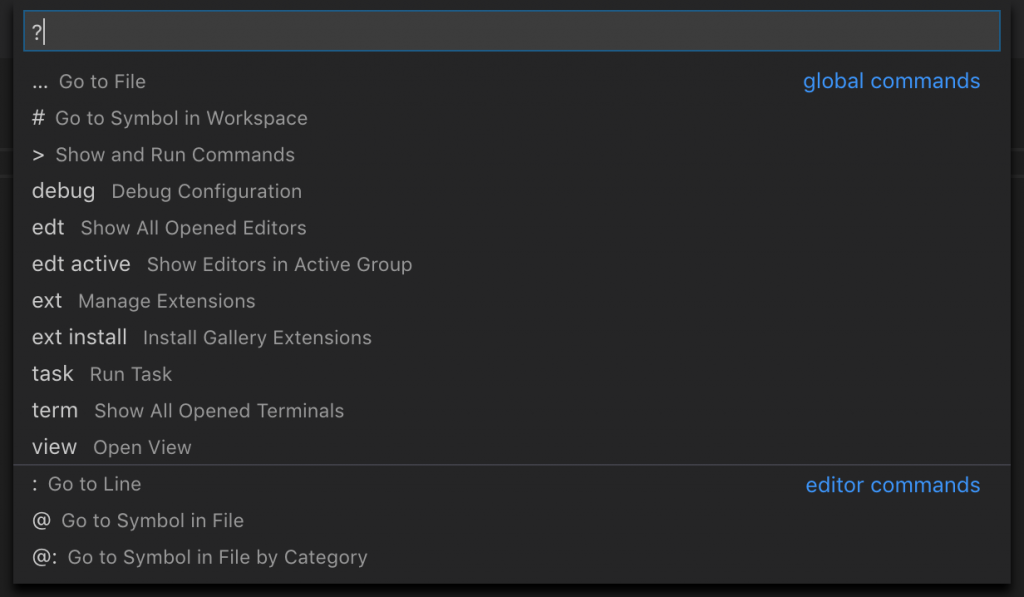
As an example, typing :23 will jump the cursor to line 23 in the opened file, writing ext will open the extensions window where you can install extensions and so on.
If you are new to VS Code, then the following Getting Started tutorials will help you getting around:
Installing Java Extenstions
To start using VS Code as Java IDE, open the Extensions Activity Bar (⇧⌘X) – or click on the Extensions icon in the Activity Bar:
Then you need to install the following extensions:
Define JAVA_HOME in VS Code
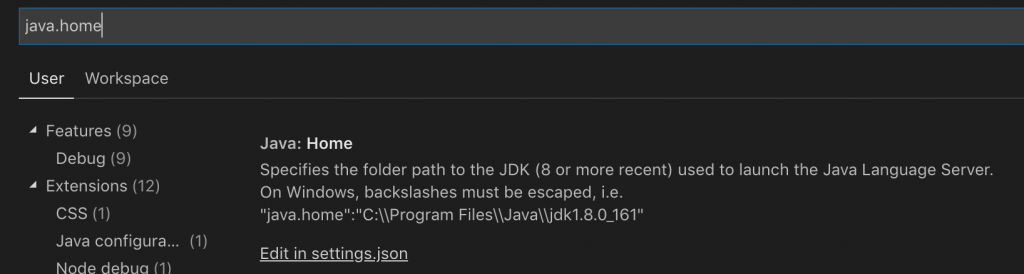
If you don’t want to define JAVA_HOME in the system and instead, you want to define JAVA_HOME in VS Code. Go to Settings in the main menu, there, search to java.home. In the search results click on and in the Settings.json file, add a key “java.home” and the java location as a value:
Working with Java in VS Code
After installing the extensions above, we are now ready to start developing in Java in VS Code, first, let’s try to open an existing Java project, as the Reactive REST API we wrote in a previous tutorial. Just go to File – Open and open the folder where the code is found, then VS Code will automatically identify the opened project as Java-based project and it will load the Java Overview page.
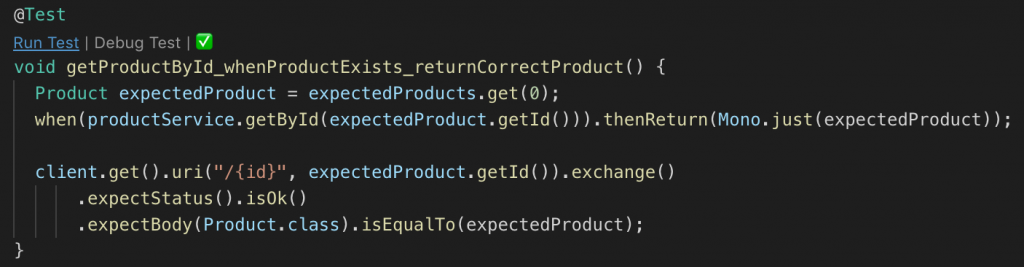
Now, let’s talk a look at our new Java IDE, first, let’s open a Java file. We will open the unit tests file ProductControllerTest.java. Click ⌘P (CTRL+P on Windows) and type PrConTes then press enter on the filename:

This will open the Java file in the Editor. Now, in the left side of the screen, in the Explorer area, we have 6 sections:
- Open Editors
- reactive-rest-api
- Outline
- Java Dependencies
- Maven Projects
- Spring-boot Dashboard
The Open Editors section will show you the opened files in your Editor while the reactive-rest-api is the opened folder with the directories structure and the files in each folder:

The Outline section is where you can see the structure of the Java class, the methods, the fields,
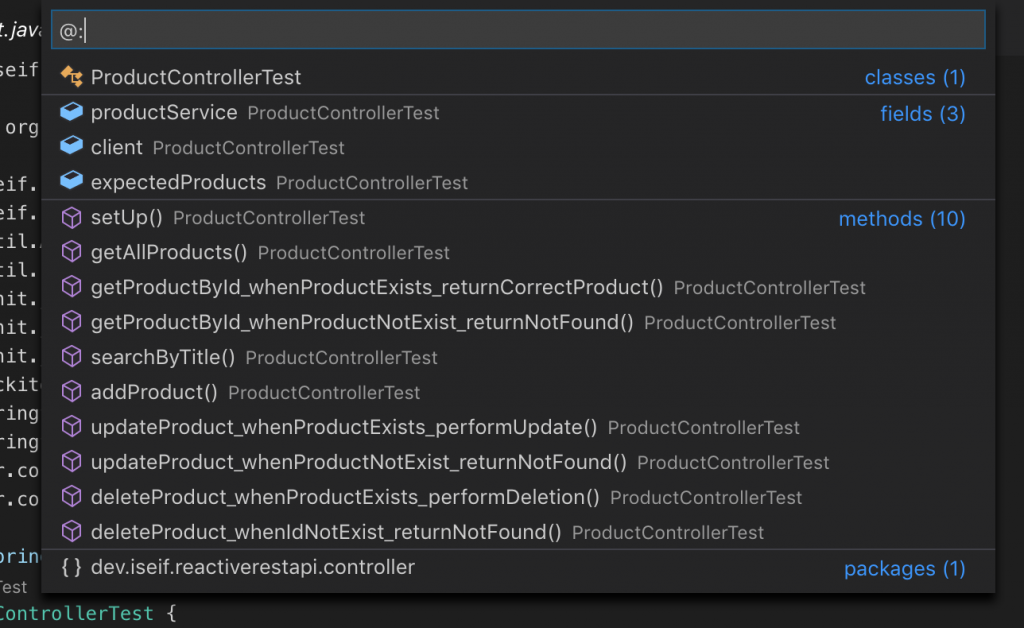
In this window, pressing up and down keys will jump the cursor to the method/field automatically.
The next section of the Explorer, is the Java Dependencies, is similar to the project view in IntelliJ or Eclipse. Here, you will see a flat package representation of the project:
BTW, you can change the view to hierarchical package representation by clicking on the Hierarchical Representation icon in the top of the view:

Then you will view the package in a Hierarchical view:
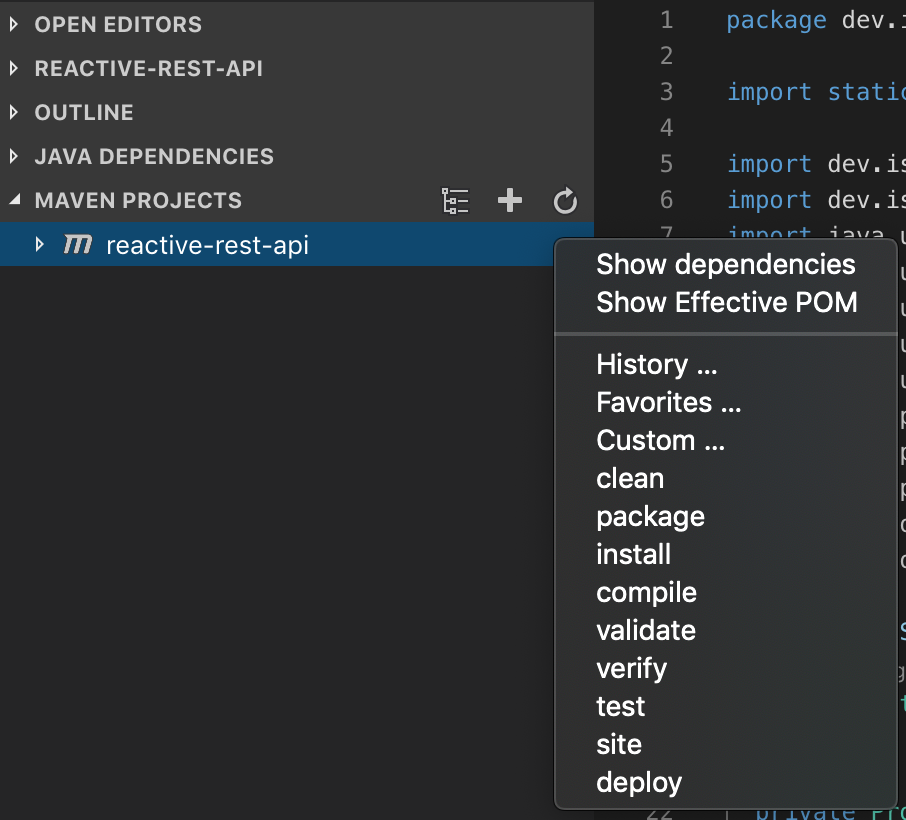
The next view is the Maven Projects, where you can create new Maven Projects, add existing projects and run maven commands:
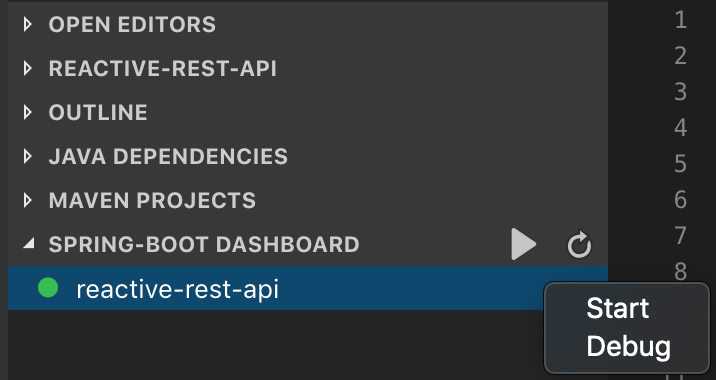
The last section is the Spring-Boot Dashboard, where you will see your spring boot application and you can start your application or run it in debug mode:
VS Code Editor
In th editor, you can do what you are doing in all the IDEs in daily basis, as going to definition, renaming etc…:
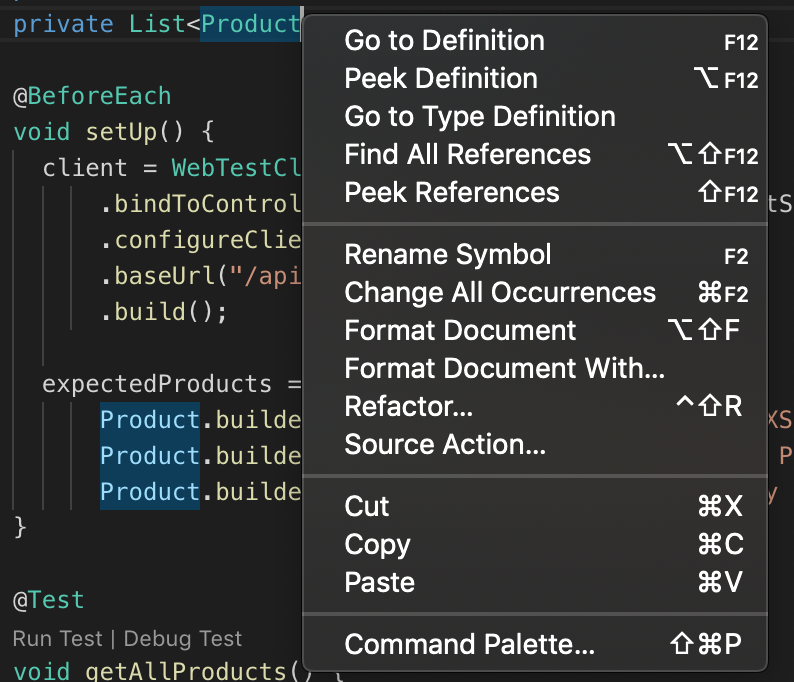
For example, Peek Definition will open the definition in the same window as for example, add the cursor on the Product symbol and press Peek Definition (in the right click window or by the keyboard shortcut):
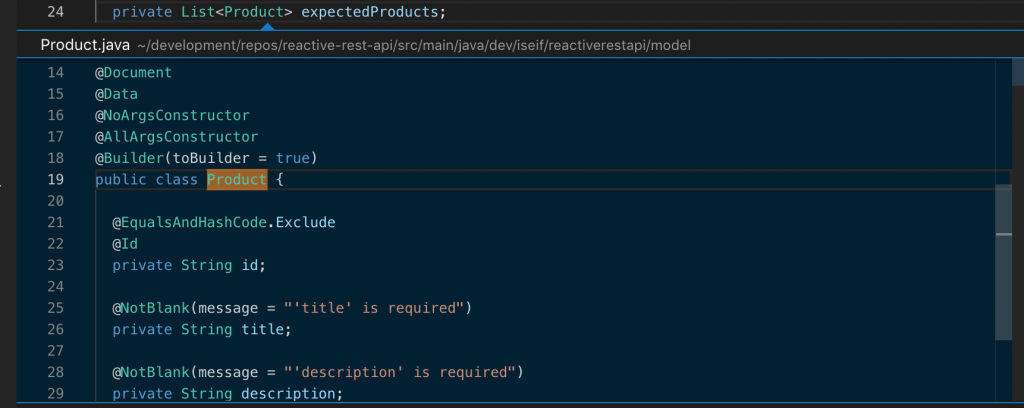
In the Peek Window, you can scroll in the class, make fast changes and then click Esc to close it.
Working with Tests
Visual Studio Code has good support to test classes (JUnit, Integration and so on…). You may already saw in the Editor after you opened the ProductControllerTest.java class that above the class and above each test there are two actions, Run Test and Debug Test. Clicking on each one will run the test in run mode or debug mode respectivily. After running the test, a green V or red X will should near of this links to indicate the status of the test, passed or failed:
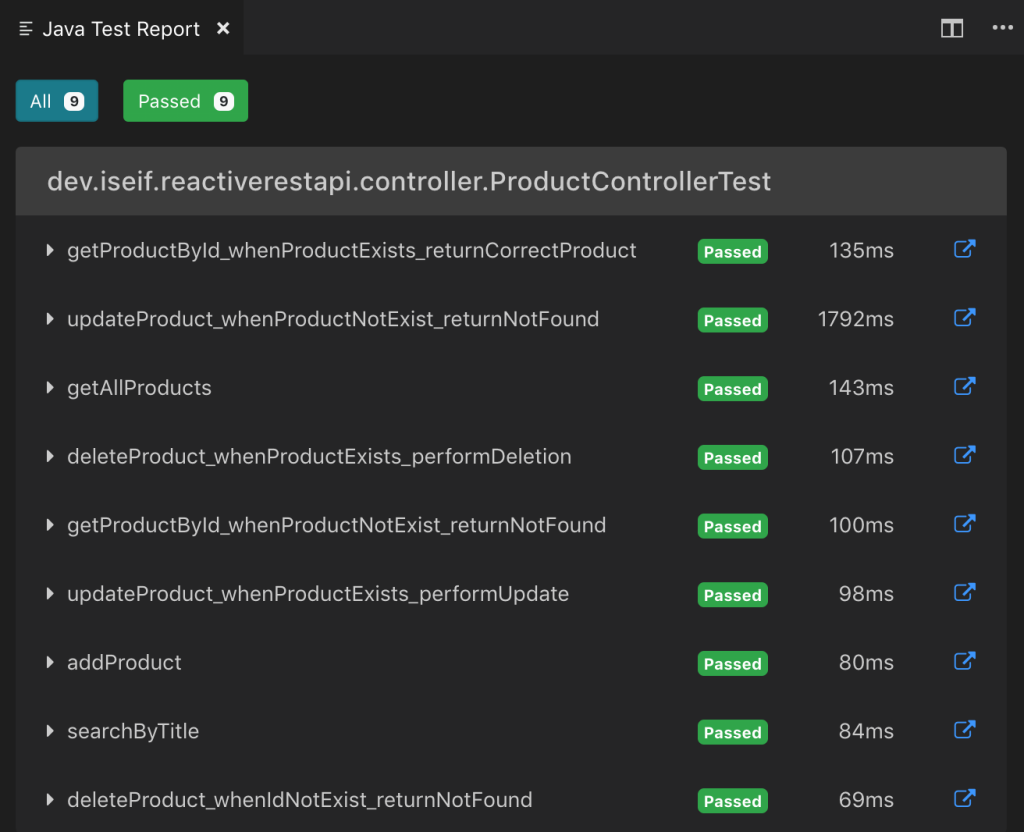
You can run all the tests in the class by clicking on the Run Test above the class definition and there you can see if all the tests passed or there were some failures.
Click on the green V or red X to open the tests results:
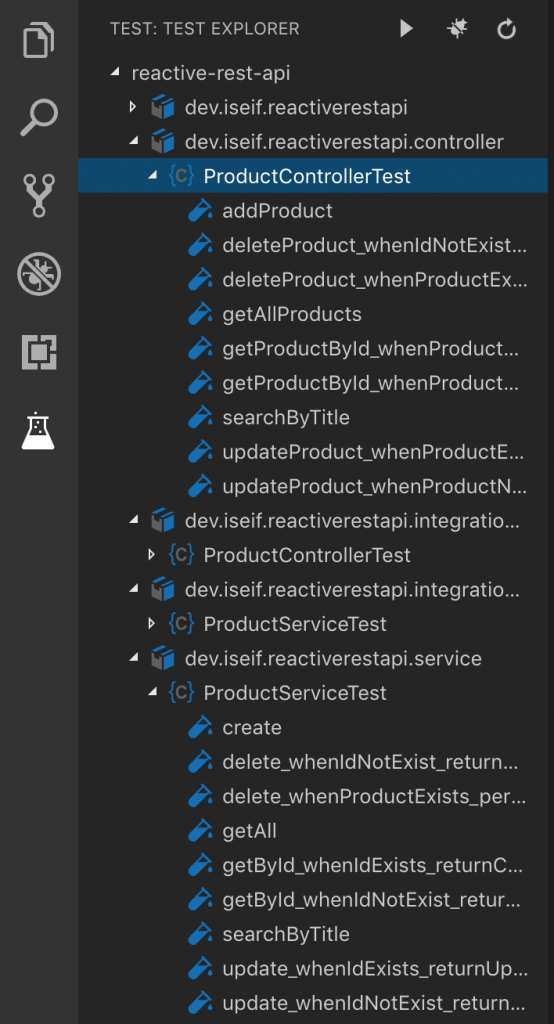
You can also see all the tests in the project and run all of them at once by going to the Test Explorer window in the left side:

There, you will see all of your test files and you can run all of them at once:
Generate Spring-Boot Application
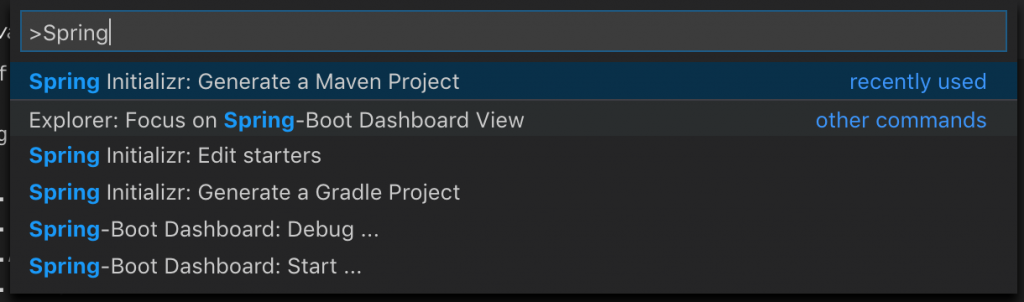
You can create new Maven or Spring Boot applications easily in VS Code, just press ⇧⌘P (CTRL+SHIFT+P in Windows) and start typing Spring then choose Spring Initializer: Generate a Maven Project:
Then, choose the language (as Java) and press Enter:

Enter the group id as dev.iseif:

After that, specify the artifact id, as in my case, I typed vscode-demo:

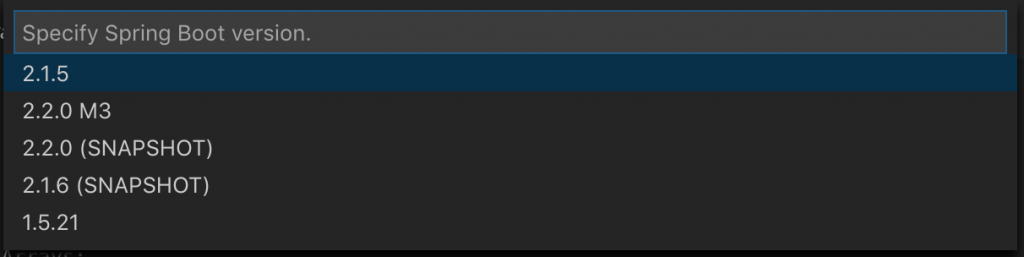
Then, choose the Spring Boot version you wish to use:
And, then, start choosing the dependencies you want to use in your project, you go over all the dependencies and click enter to chose one, or, search the dependencies and press enter to choose. In the end, press Enter of the first one in the list to go to the next step:
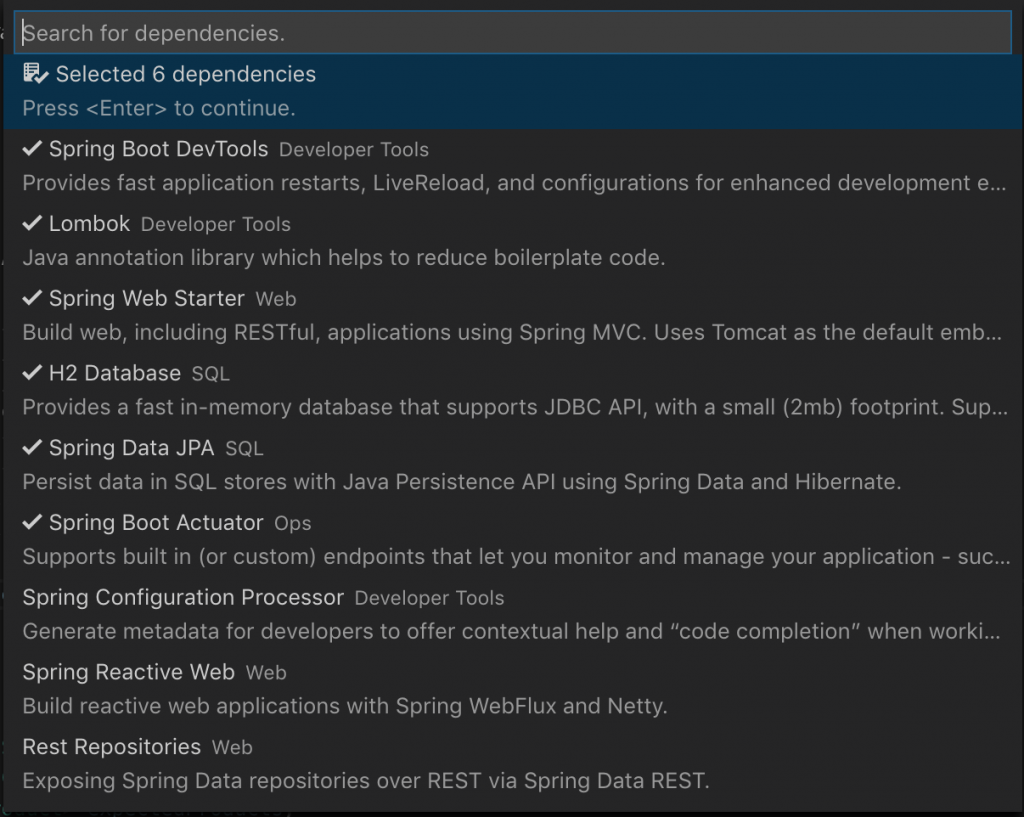
In my case, I selected 6 dependencies for example:
- Spring Boot DevTools
- Lombok
- Spring Web Starter
- H2 Database
- Spring Data JPA
- Spring Boot Actuator
The next last step, is to choose the directory where you want to generate the project. Go to the folder you want to put your project files and press Generate into this folder button:

Now, VS Code will generate the application files and in the end, a pop-up notification will appear in the left asking you if you want to open the new generated project:
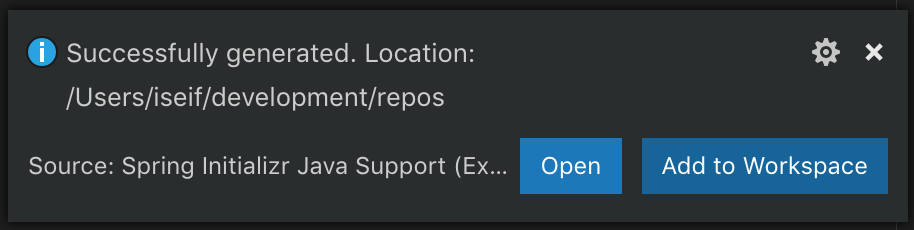
Click Open and the new project will be opened in VS Code.
Now, let’s create a model and a controller before running the project. Open the source folder and create a new folder called model and there, create a new java file called Message.java – in this file, start writing class and choose the class template to generate a new class:

Now, a new class skeleton is created, add the following code to create the Message class:
package dev.iseif.vscodedemo.model;

import lombok.AllArgsConstructor;
import lombok.Data;

/**
 * Message
 */
@Data
@AllArgsConstructor
public class Message {

    String message;
}
Notice the autocomplete, for example, if you start typing the annotation @AllAC then VS Code will suggest you
Now, let’s create a new folder called controller and in it, create a new java file called HelloController.java:
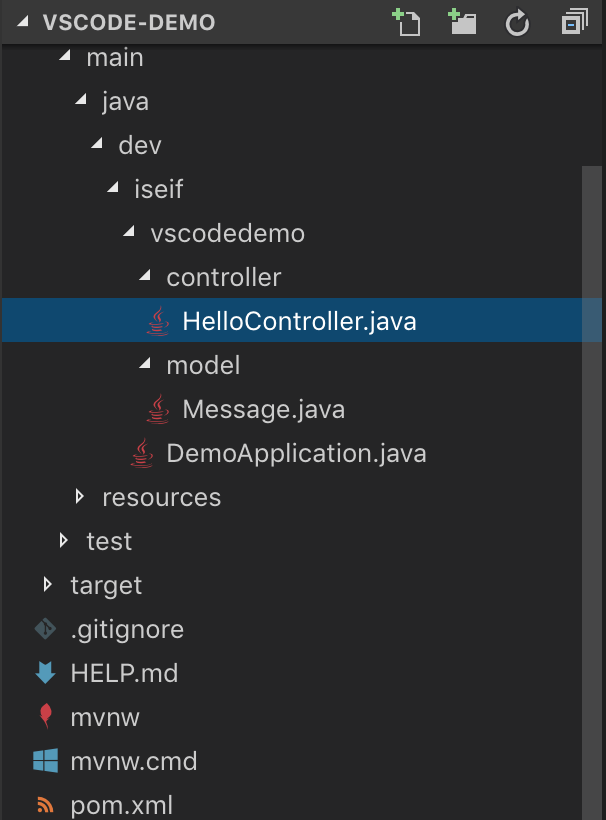
In the HelloController.java file, add the following code:
package dev.iseif.vscodedemo.controller;

import org.springframework.web.bind.annotation.GetMapping;
import org.springframework.web.bind.annotation.RequestMapping;
import org.springframework.web.bind.annotation.RestController;

import dev.iseif.vscodedemo.model.Message;

/**
 * HelloController
 */
@RestController
@RequestMapping("/api")
public class HelloController {

    @GetMapping("/hello")
    public Message helloWorld() {
        return new Message("Hello World!");
    }
}
Now, let’s ask Maven to P
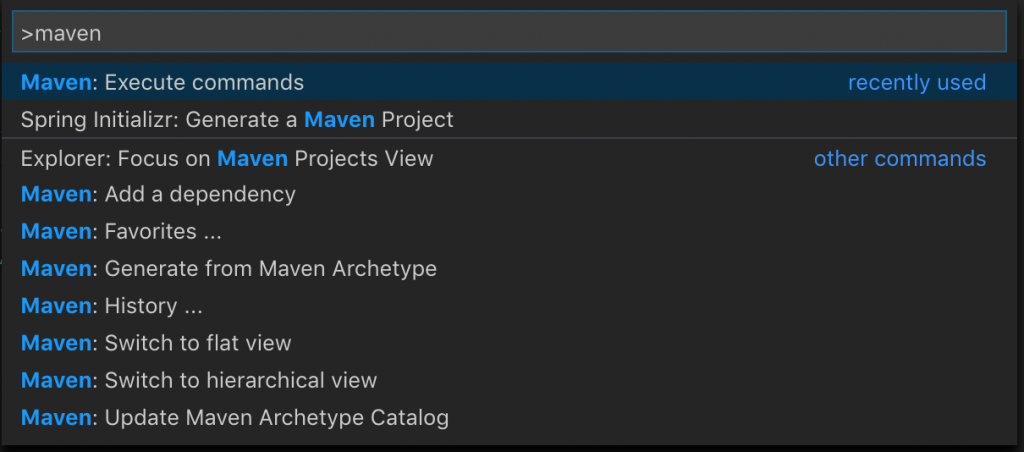
Or, using the ⇧⌘P (CTRL+SHIFT+P in Windows). There, start writing Maven and choose Maven: Execute commands:
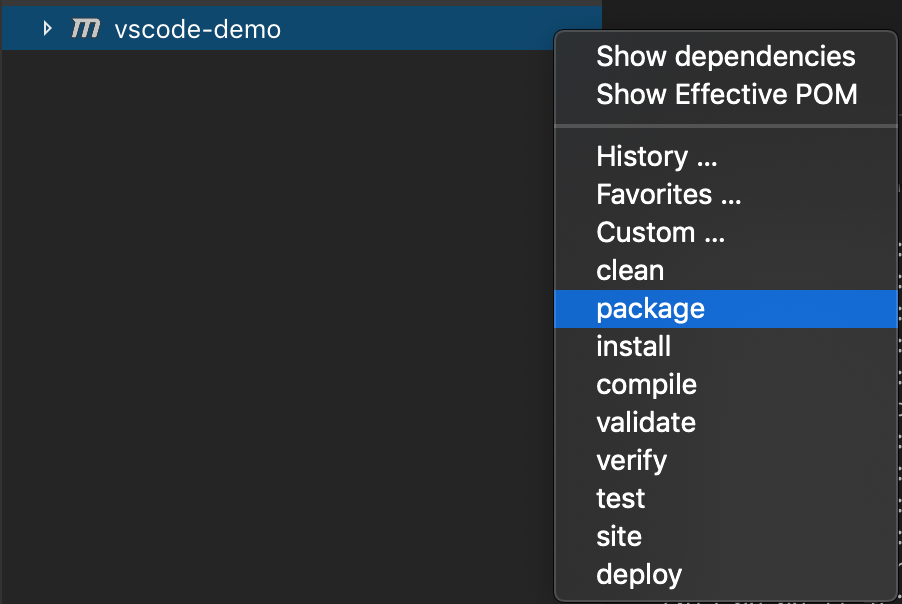
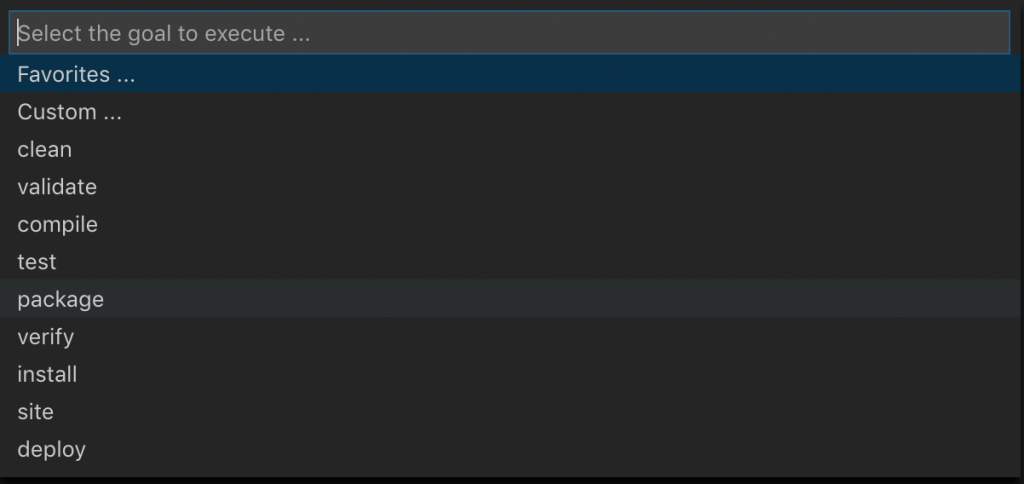
Then choose the project name and in the last window, choose which command(s) you want to run, for example, choose Package:
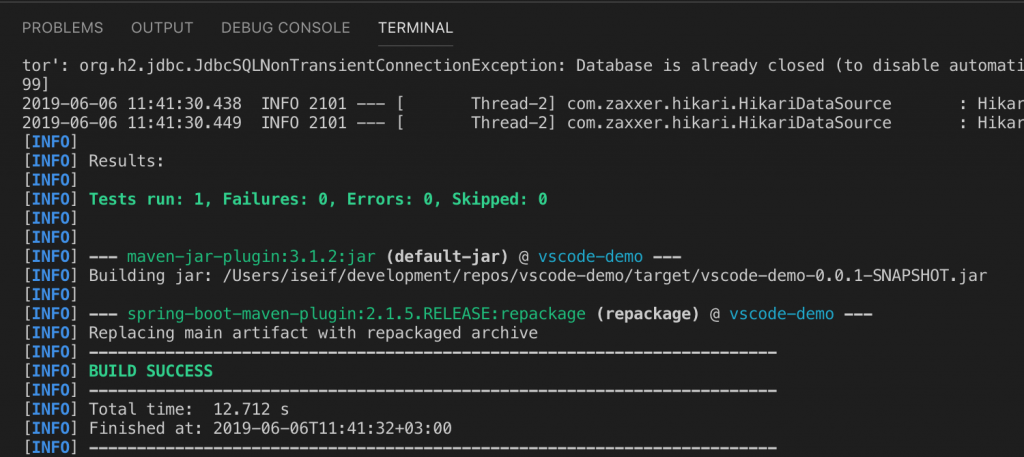
Then the package process will start in the terminal:
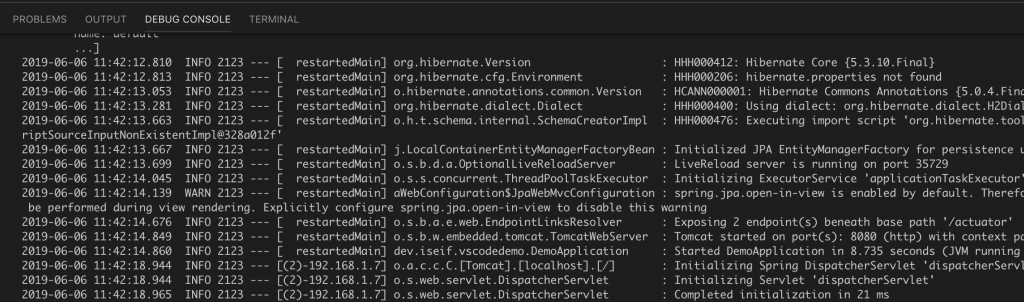
Now, let’s run our application, open the main application file, DemoApplication.java. Above the main class, press the Run command:

And the application will start:
Now, open the Postman for example and run GET rest command on localhost:8080/api/hello:
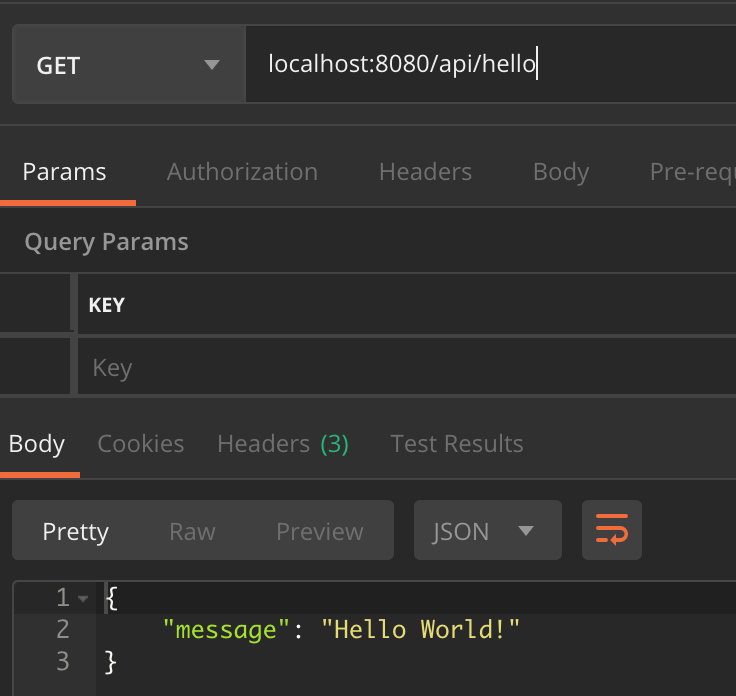
That’s it! We are done. You can stop or restart the application in the run menu in the top of the VS Code window:

Recommended Extensions
Below is a list of recommended extensions that you can install in VS Code that will improve your day-to-day work:
- Tomcat: Debug or run your java war package in Apache Tomcat
- Jetty: Start and run or debug your war package on Jetty
- :
emojisense :: Adds suggestions and autocomplete for emoji - Auto Close Tag: Automatically add HTML/XML close tag
- Auto Rename Tag: Auto-rename paired HTML/XML tag
- Auto-Open Markdown Preview: Open Markdown preview automatically when opening a Markdown file
- AutoFileName: Autocomplete file name
- Better Comments: Improve your code commenting by annotating with an alert, informational, TODOs, and more!
- Bookmarks: Mark lines and
jump to them - Bracket Pair Colorizer 2: A customizable extension for colorizing matching brackets
- change-case: Quickly change the case (camelCase, CONSTANT_CASE, snake_case, etc) of the current selection or current word
- Code Runner: Run scripts of a huge number of languages
- Code Spell Checker: Spelling checker for source code
- EditorConfig for VS Code: EditorConfig Support for Visual Studio Code
- Git History: View git log, file history, compare branches or commits
GitLens — Git supercharged: Supercharge the Git capabilities built into Visual Studio Code — Visualize code authorship at a glance via Git blame annotations and code lens, seamlessly navigate and explore Git repositories, gain valuable insights via powerful comparison commands, and so much more- Image preview: Shows image preview in the gutter and on hover
- JSON Tools: Tools for manipulating JSON
- Live Share: Real-time collaborative development from the comfort of your favorite tools
- Markdown All in One: All you need to write Markdown (keyboard shortcuts, table of contents, auto preview and more)
- Output Colorizer: Syntax highlighting for log files
- Path Intellisense: Visual Studio Code plugin that autocompletes filenames
- Peacock: Subtly change the workspace color of your workspace. Ideal when you have multiple VS Code instances and you want to quickly identify which is which
- Polacode: 📸 Polaroid for your code
- Project Manager: Easily switch between projects
- Rainbow CSV: Highlight CSV and TSV files in different colors, Run SQL-like queries
- REST Client: REST Client allows you to send HTTP requests and view the response in Visual Studio Code directly
- Rewrap: Re-wraps comments and other text to a given line length
- Settings Sync: Synchronize Settings, Snippets, Themes, File Icons, Launch, Keybindings, Workspaces,
and Extensions Across Multiple Machines Using GitHub Gist vscode -faker: Generate fake data for name, address, lorem ipsum, commerce and much more